

Maybe you have a hole in your favorite pair of jeans and want to cover it up, or perhaps you just want to add a little bit of extra style to your look.
No matter what your reason is, knowing how to iron a patch on jeans is a must-have skill. In this article, we’ll show you how to do it properly. Keep reading for all the details!
How To Iron A Patch On Jeans: Step By Step
Step 1. Make an Iron-On Patch First
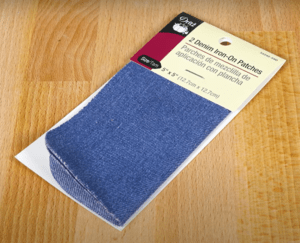
There’s no limit to your imagination when it comes to iron-on patches now that flock vinyl is available. Polyester and cotton are ideal for them. On the other hand, you should steer clear of applying them on:
- Rayon
- Nylon
- Silk
Step 2. Cutting the Patch
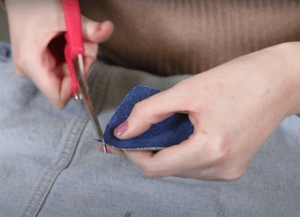
Use scissors to cut out the patch when you’ve found the perfect design. Make sure to cut around the edges of the design as well. The excess vinyl or fabric around the edge will help create a barrier between the hot iron and your clothing.
Step 3. Position Your Ironing Board
Position your ironing board near an electrical outlet, so you can easily plug in your iron. If you’re using an ironing board cover, make sure it’s smooth and free of wrinkles.
You might also want to use a pressing cloth between your clothing and the ironing board cover to protect your clothes from the heat. Remember that they need certain application times and temperatures when applying to cloth.
Step 4. Pre-heat the Iron
Set your iron to the hottest setting possible. If you’re unsure what temperature to use, check the instructions with it. For example, if you’re using an iron-on patch made of polyester, you’ll need to set your iron to between 315 and 375 degrees Fahrenheit.
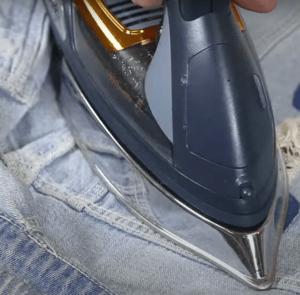
Step 5. Iron the Patch
Position it on your jeans where you want it to go. Place a pressing cloth over the top of it and then press down with the iron. Hold the iron in place for the amount of time recommended in the instructions.
Once you’re done, allow it to cool completely before moving on to the next step.
Step 6. Apply Iron-on Appliques
There’s more to do after ironing on patches to jeans. Jeans may have appliqués sewn onto them or ironed on. Appliqués are a kind of stitched fabric used to embellish apparel.
It’s recommended to pre-warm the jeans with an iron before putting the appliqué.
Cover the appliqué with a piece of fine cotton fabric. If you want to ensure it stays there, iron over it for half a minute.
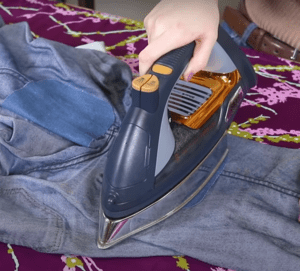
Step 7. Heat the Backside Too
The backside of the patch also needs to be heated so the entire thing can adhere to the fabric. Place the iron on the back for around 30 seconds. This will help to seal it and prevent it from coming off.
Step 8. Whip-Stitching
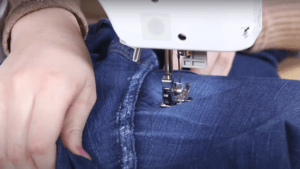
This is an optional step, but it’s a good idea to do if you want your piece to last even longer. Whip-stitching is a type of stitching that helps to reinforce the edges. To do this, you’ll need a needle and thread. Start by threading the needle and then tie a knot at the end.
Once you’ve done that, insert the needle through the fabric from the back to the front. Then, insert the needle through the patch from the front to the back. Continue doing this until you’ve gone around the edge. When you’re done, tie off the thread and trim any excess.
More Choices for Patches
1) Sew-on Patches
They are just what they sound like: patches that you sew onto your clothing. The main advantage of sew-on patches is that they’re less likely to come off than iron-on ones. They are also a good choice if you’re looking for a more permanent solution.
The downside is that they can be more challenging to apply. You’ll need to have some basic sewing skills and access to a sewing machine. They can also be more time-consuming to apply than iron-on patches.
2) Velcro Patch
A velcro patch is a great way to add a bit of flair to your jeans. You can find velcro ones in all sorts of colors and designs. All you have to do is peel off the backing and stick it on. But, of course, they’re also easy to remove if you change your mind.
How to Apply Fabric Patches
Make a pattern on the cloth and cut it out. Knee patches need to fit snugly, so cut them so that it’s just a little bigger than the hole.
1. Get the form and size of your fabric patch to ensure that the sticky web will fit properly.
For use, remove the backing from the fusible web. Then, put the fabric where you want it to be fixed.
2. Use scissors to trim the excess fabric and fusible web once you’ve adhered the patch to the garment. Remove any notches while cutting them together.
3. Take off the fusible web backing and place the patch where you want it to go on your jeans before you sew it on.
4. Use caution while drying the jeans since doing so with a fabric sheet that includes chemicals may make the fusible web lose from the jeans.
How to Iron-on Patches Using Vinyl
Vinyl is a type of plastic that is often used to make patches. It’s also the material that is used for most iron-on transfers. If you’re using a heat transfer vinyl (HTV), the process will be pretty straightforward.
1. Put your creative skills to use by making a design with specialized software. In order to cut HTV properly, frames must first be mirrored.
2. The vinyl’s reflective side is recommended to lie flat on the cutting pad.
3. Take off the extra vinyl.
4. After weeding, use an iron or heat press on the wrong side of it.
5. Apply firm pressure for about 10-15 seconds.
6. Let it cool down and check to see if the edges are now sealed. If not, repeat step 5.
Frequently Asked Questions
How long do you iron patches on jeans?
You should do them on jeans for about 20-30 seconds. However, if the edges are not sealed, you may need to iron for longer. So, be sure to check the seal before moving on.
Do iron-on patches work on jeans?
Yes, they can be attached to jeans. In fact, they work on most fabrics as long as the material can withstand the heat of an iron. Thicker fabrics, like denim, may require a slightly longer ironing time. However, it’s always best to test it on a piece of scrap fabric before attaching it to your jeans.
How do you iron on a patch?
The process is pretty simple. Just put it on the garment, set your iron to the hottest setting that is safe for the fabric, and press down for 30 seconds. Be sure to use a pressing cloth between the iron and it to prevent damage.
How do you iron a blue jean patch?
You can iron a blue jean patch the same way you would iron any other type. The main thing to remember is to use a piece of parchment paper or a thin towel between the patch and the iron to protect it from getting too hot.
Conclusion
There are many things you need to know and do to make sure that it turns out the way you want it to. But, you can always look for a professional like TodayPatches to make your patches for you.
You need to provide them with your design, and they’ll take care of the rest. So, why keep struggling when you can have someone else do it for you? Contact Today Patches and get your patches made now! Hope the article helped you with how to iron a patch on jeans.
