
Embroidered patches are a fun craft, but adding a smooth, finished satin edge border elevates your designs to the next level. Let’s explore how to edge your patches with a polished satin edge neatly.
Contents
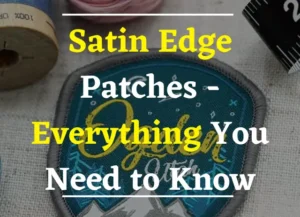
What is a Satin Edge Patch?
Simply put, a satin edge patch has your embroidery design in the center framed by a smooth, polished border. The goal is to accentuate and elevate your design’s beauty with a neat finish.
In this post, we’ll go over several topics to help you achieve professional-looking satin edges:
Fabric Choices – What fabrics hold stitches well for neat borders?
Thread Options – Tips for selecting coordinating or contrasting threads
Essential Techniques – Learn stitches like satin, blanket, and more.
Customization Ideas – Get creative with unique shapes and embellishments
Presenting Your Work – Ideas for displaying patches and sharing your finished patches
By the end, you’ll have the skills to give your embroidered patches a polished look with easy satin edging. Let’s jump into the first section on choosing your materials!
Choosing The Perfect Material
The fabrics and threads you choose set the foundation for neat, professional-looking satin edges.
Shopping For Fabric
Aim for tightly woven fibers over loosely knit ones when shopping for your patch backing. Fabrics like twill and lightweight denim allow stitches to sink in. For felt enthusiasts, doubling up layers adds stability. Always test stitching different threads on scraps first.
Thread Considerations
Most embroidery floss or poly/cotton blends do the trick nicely. Match your thread color to your design for cohesion. But feel free to experiment with coordinating or contrasting hues too! For patches meant for outdoor gear, like bikers, sportswear, and emergency apparel, dual-ply nylon guarantees long-lasting durability.
Techniques To Master Satin Edge Patches
The Satin Stitch
The satin stitch yields a smooth, filled-in appearance without any texture showing through on the front. To execute it:
- Pull a single thread or strand of floss tightly across the fabric in very straight rows that overlap just slightly.
- Press each new stitch firmly against the previous one to fill in the space beneath without gaps showing.
- Maintain an even stitch density where the rows are a consistent distance apart. Go slowly for neatness.
Using Satin Stitch for Borders
Unlike looser running stitch borders, the satin wrap technique delivers a cohesive, polished look:
- It encases the entire perimeter edge in one continuous thread line rather than spaced-out running stitches.
- This results in a much smoother border that enhances the overall appearance of the patch.
We’ve discussed the beauty of a finished satin stitch, but how exactly is one created? Let’s take a closer look at the process.
How is a Satin Stitch Border Made?
To embroider a neat satin border, follow these steps:
Mark the Design Boundary
Use split or contour stitches in a complementary thread color to clearly outline where you’ll place the border. This initial marking acts as a guide strip around the patch design area.
Fill in the Outline
Working small sections at a time, pull a thread tightly along the marked line in overlapping satin stitches. This slowly builds up the solid border strip.
Maintain Consistent Tension
Check that each new stitch is pressed closely against the last to avoid gaps or looseness. Keep an even tension and stitch density for the smoothest appearance.
Inspect your Work
Frequently examine your progress to catch minor imperfections before moving on.
Beyond Basic Satin Stitch
While satin stitching is lovely for straight borders, you’ll want options for creative shapes too!
Blanket Stitch Beauty
This stitch has a bit of texture that follows curves beautifully. Its bumps allow flexibility. Try it when satin feels too stiff.
Zigzag Zest
Tight, narrow zigzags sewn super close together deliver an eye-catching scalloped finish. You can play with stitch length and width for variations.
Invisible Hem Innervation
Use tiny, neat stitches for simple styles to anchor the fabric right at the edge. Almost magical how it disguises the starting point!
Starting and Finishing Neatly
Always knot your thread inside the fabric at the beginning. End by anchoring again about 1/4″ away and bury loose tails under earlier stitches to prevent fraying later on.
Finishing Touches For Your Patch
Once completely stitched, seal all thread ends with a dab of fray check. This ensures your patches will stay vibrant season after season.
Showing off Your Work
Now it’s time to proudly display your handiwork on denim jackets, tote bags, hats – anywhere you want a splash of your style! Photograph flat lays for Instagram with hashtags to engage fellow fiber artists. You can also set up an online shop on Etsy or your site to sell customized patches in Houston.
FAQs
How do you do a satin edge?
The most common method is to use a satin stitch. This involves sewing overlapping V-stitches very close together along the edge. You can also use a blanket stitch for curved edges or a tight zigzag stitch.
What fabrics work best?
Woven fabrics like cotton, linen, or felt hold stitches nicely. Avoid loosely knit fabrics. Twill and denim allow the thread to sink in smoothly. Always test stitch on scraps first.
How do I start and stop stitching?
Knot the thread on the fabric at the beginning. To finish, secure the thread on the fabric about 1/4 inch from the starting point. Bury the thread tails under earlier stitches.
Can I add embellishments?
Yes, definitely! You can bead, quilt, or embroider additional details inside or around the border of your patch.
